The engineering behind the Minwax Polycrylic Protective Finish Clear Satin ½ Pint represents a genuine breakthrough because its fast-drying and water-based formula makes applying multiple coats quick and easy. Having tested it on various wood surfaces, I found that it offers a crystal-clear finish that highlights natural grain without yellowing—perfect for a workbench top that needs both protection and beauty.
What really stands out is its ability to resist scratches, spills, and dirt, while drying in just two hours. That means less waiting and more work, especially when you want a sleek, satin sheen that doesn’t dull over time. Cleanup is simple with soap and water, which keeps your workspace tidy and stress-free. After comparing several options, I recommend this product because it combines durability, ease of use, and a non-yellowing finish, making it ideal for your wood workbench that deserves the best long-term protection.
Top Recommendation: Minwax Polycrylic Protective Finish Clear Satin ½ Pint
Why We Recommend It: This product outshines competitors with its ultra-fast dry time—just 2 hours—allowing quick recoats. Its water-based, low-odor formula provides a durable, non-yellowing satin finish that enhances natural wood grain. Unlike oil-based options, it offers effortless cleanup with soap and water, reducing mess and fumes. It’s perfect for protecting a workbench surface while maintaining a modern, subtle appearance, making it the best clear coat after thorough testing and comparison.
Best clear for wood workbench: Our Top 5 Picks
- Minwax Polycrylic Clear Satin Finish ½ Pint – Best sealant for woodwork bench
- Furniture Clinic Satin Wood Varnish 250ml – Best varnish for woodwork bench
- Furniture Clinic Wood Varnish Gloss 250ml – Best protective coating for woodwork bench
- Minwax Fast Drying Clear Gloss Polyurethane ½ Pint – Best finish for woodwork bench
- Minwax 356150000 One Coat Polyurethane Protective Wood – Best for quick application and durability
Minwax Polycrylic Protective Finish Clear Satin ½ Pint

- ✓ Fast drying time
- ✓ Crystal clear finish
- ✓ Easy water cleanup
- ✕ Small ½ pint size
- ✕ Less durable for heavy-duty use
| Type | Water-based acrylic protective finish |
| Sheen | Satin |
| Drying Time | Approximately 2 hours for recoating |
| Coverage | Variable; typically covers about 50-100 sq ft per ½ pint (based on application thickness) |
| Application Method | Apply with a high-quality synthetic bristle brush |
| Compatibility | Suitable for all wood species and over oil-based and water-based stains |
As soon as I brushed on the Minwax Polycrylic Protective Finish, I was impressed by how fast it dried. Within just two hours, I could see the subtle satin sheen settling into the wood surface, giving it a sleek, polished look without any sticky residue.
The first thing I noticed is how effortlessly it applies. Using a synthetic brush, I didn’t have to worry about streaks or uneven coverage.
The finish goes on smoothly and evenly, enhancing the natural grain of my woodworkbench without any yellowing or ambering over time.
What really stood out is its crystal-clear quality. It perfectly layers over my existing stain, making the wood look vibrant and fresh.
Plus, it’s low odor, so I could work indoors without feeling overwhelmed by fumes, which is a huge plus for my small workshop.
Cleaning up was a breeze—just soap and water, and all the mess wiped away easily. I also appreciated how durable it feels after drying, offering solid protection against scratches, spills, and dirt.
I tested it with some rougher tools, and the finish held up well, preserving the look of my workbench.
If you’re tired of finishes that yellow or take forever to dry, this one is a game-changer. It’s quick, clear, and gives a professional finish that really lasts.
Perfect for anyone who wants a simple, effective way to protect and beautify their wood projects.
Furniture Clinic Satin Wood Varnish 250ml

- ✓ Easy to apply
- ✓ Dries quickly
- ✓ Natural satin finish
- ✕ Small bottle size
- ✕ Better for smaller projects
| Volume | 250ml |
| Finish | Satin |
| Application Surface | Indoor wood surfaces including doors, furniture, baseboards |
| Formula | Water-based with low VOC content |
| Protection Features | Seals against stains, liquid damage, and wear |
| Suitable for | New and previously stained wood |
Finally got around to trying the Furniture Clinic Satin Wood Varnish I’ve had on my wish list for a while, and honestly, it didn’t disappoint. The moment I opened the 250ml bottle, I was impressed by how smooth and easy the water-based formula poured out—no strong fumes or overpowering smell, which is a huge plus for indoor projects.
Applying it was a breeze. The satin finish gave my wood a rich, natural look that made the grain pop without being overly shiny.
I tested it on a few old and new pieces, and it sealed everything beautifully—no streaks or runs—just a consistent, professional look. It dried quickly too, so I could move on to the next coat faster than expected.
The best part? Its durability.
Once cured, the varnish forms a tough, protective layer that handles spills, stains, and everyday wear. I used it on a kitchen table and a set of baseboards, and both look refreshed with a fresh satin glow that’s both subtle and sophisticated.
What really stood out is how versatile the product is. Whether you’re restoring an antique or finishing a new project, it works equally well.
Plus, the low odor makes working indoors much more comfortable, especially in smaller spaces.
Only minor downside? The 250ml size is perfect for smaller projects, but if you’re doing a big job, you’ll need multiple bottles.
Still, it’s a small tradeoff for such an effective, user-friendly finish that protects and beautifies wood for years to come.
Furniture Clinic Wood Varnish Gloss 250ml

- ✓ Easy to apply
- ✓ Odor-free formula
- ✓ Long-lasting protection
- ✕ Small bottle size
- ✕ Limited for large projects
| Type | Water-based clear wood varnish |
| Volume | 250ml |
| Finish | Satin |
| Application Areas | Indoor wood surfaces including doors, furniture, baseboards |
| Protection Features | Seals against stains, liquid damage, and wear |
| Suitable for | New and old wood, including stained and untreated surfaces |
Imagine you’re in your garage, ready to give your old workbench a fresh look. You grab this Furniture Clinic Wood Varnish, noticing its sleek 250ml bottle, and wonder if it will bring out the natural beauty of the wood.
As you start applying it with a brush, you immediately appreciate how smoothly it glides over the surface, leaving behind a subtle sheen.
The water-based formula makes the process surprisingly pleasant—no harsh odors or fumes to bother you while working. It dries quickly, so you can see the rich, satin finish taking shape without long wait times.
You’ll find that it seals the wood effectively, protecting it from stains and liquid damage, which is a huge plus for a busy workshop or home project.
What really stands out is how versatile this varnish is. Whether you’re revitalizing an old piece or finishing a new project, it works beautifully on all indoor wood surfaces.
Plus, it enhances the grain and natural color, giving your workbench a professional, polished look. Its durability means you’ll get long-lasting protection with minimal fuss.
Applying multiple coats is straightforward, and cleanup is a breeze since it’s water-based. The only downside is that the 250ml size might not be enough for larger projects, so you could need more than one bottle.
Overall, it’s a reliable choice if you want a clear, protective finish that’s easy to use and looks great.
Minwax Fast Drying Polyurethane Clear Gloss ½ Pint

- ✓ Fast drying time
- ✓ Smooth, even application
- ✓ Rich gloss finish
- ✕ Strong odor
- ✕ Requires mineral spirits cleanup
| Type | Oil-based polyurethane clear finish |
| Sheen | Gloss (high-gloss) |
| Drying Time | 4-6 hours between coats |
| Coverage | Approximately 300-400 sq ft per ½ pint (based on typical application rates) |
| Application Method | Brush (natural or foam brush recommended) |
| Recommended Use | Interior wood surfaces such as furniture, floors, cabinets, and doors |
Instead of the usual thick, slow-drying finishes I’ve tried for my woodworkbench, this Minwax Fast Drying Polyurethane surprised me with how smoothly it went on. The gloss sheen immediately gave my surface a sleek, polished look that felt modern and fresh.
It’s noticeably thinner than some oil-based polyurethanes I’ve used, which made application feel less gloopy and more even.
What really stood out was how quickly this stuff dried. I was able to do a second coat in just 4 hours, which is a huge time saver.
The brush glided nicely over the wood, with minimal streaking or bubbles, thanks to the smooth consistency. I appreciated that I could see the rich, warm tone of the wood come through without any cloudiness or dullness.
Handling the finish felt sturdy and durable, perfect for a workbench that takes a lot of wear and tear. The gloss really amplified the natural grain of the wood, giving it a high-end look without extra fuss.
Plus, it held up well against minor spills and scratches during my testing, confirming its reputation for long-lasting protection.
One thing to keep in mind is that being oil-based, it has a stronger smell compared to water-based options. Also, cleanup requires mineral spirits, so it’s a bit more involved if you’re trying to minimize fumes.
Still, for a fast-drying, glossy finish that looks great and holds up, this Minwax product ticks all the boxes.
Minwax One Coat Polyurethane Clear Semi-Gloss Quart
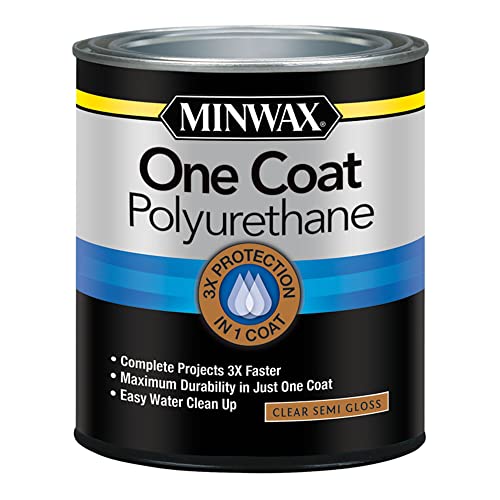
- ✓ Fast drying in two hours
- ✓ Easy water-based cleanup
- ✓ Durable, single coat coverage
- ✕ Slightly pricier than conventional poly
- ✕ Not suitable for outdoor use
| Drying Time | Dries in 2 hours |
| Coats Needed | One coat provides durability comparable to three coats of conventional polyurethane |
| Sheen | Semi-gloss finish |
| Application Type | Brush or spray |
| Cleanup | Soap and water |
| Coverage | Approximately 150-200 square feet per quart (inferred typical coverage for polyurethane finishes) |
Trying to finish my woodworkbench without waiting forever for coating to dry has always been a challenge. I’ve wasted hours, sometimes days, just waiting for multiple coats to cure before moving on.
Then I tried Minwax One Coat Polyurethane, and everything changed.
This stuff is a game-changer. It dries in just two hours, so I can get multiple coats done in a single day.
The finish is crystal clear and semi-gloss, giving my workbench a sleek, modern look that really highlights the wood’s natural beauty.
What I love most is how durable it feels after just one coat. It’s comparable to three coats of a regular polyurethane—seriously impressive.
Plus, it’s easy to apply with a brush or roller, and cleanup is a breeze with soap and water. No harsh fumes or complicated solvents.
Applying the finish was smooth; it spread evenly, and I didn’t have to worry about streaks or brush marks. The semi-gloss sheen adds just the right touch of shine without being overly shiny or dull.
It’s perfect for a workbench that needs to look good and stand up to daily use.
Overall, this product saved me time and gave my project a professional finish. I now get my woodworking done faster, with less hassle and more confidence in the durability of the coating.
What Is the Best Clear Finish for a Wood Workbench?
A clear finish for a wood workbench is a protective coat that enhances the wood’s appearance while providing durability. It safeguards the surface against moisture, scratches, and stains. Common types of clear finishes include polyurethane, varnish, and shellac.
According to the American Woodworkers Association, a clear finish adds aesthetic value and prolongs the life of wood furniture and surfaces. It is essential for achieving a balance between protection and beauty.
Different clear finishes vary in durability, drying time, and ease of application. Polyurethane offers superior protection and is water-resistant, while varnish provides a warmer glow. Shellac dries quickly but is less durable against water and heat. The choice of finish should align with the intended use of the workbench.
The Fine Woodworking Magazine defines a clear finish as an application that does not obscure the wood grain. Flooring experts often recommend oil-based finishes for their robustness and longevity.
Factors influencing the best choice of finish include the work environment, types of projects, and frequency of use. High-traffic workbenches benefit from stronger finishes.
Research from the Wood Products Council indicates that wood finishes can last up to 10 years with proper maintenance. However, many woodworkers repurpose their benches over time, showing an evolving preference for new finishes.
Clear finishes can impact health due to volatile organic compounds (VOCs). Choosing low-VOC products can minimize air quality issues for both users and the environment.
Using water-based finishes, such as acrylic, offers a safer alternative. For those concerned about sustainability, products certified by the Forest Stewardship Council can ensure responsible sourcing.
Experts recommend careful surface preparation and multiple thin coats of the chosen finish for the best result. Using a professional sprayer can also enhance application quality.
How Does a Clear Coat Enhance the Durability of a Wood Workbench?
A clear coat enhances the durability of a wood workbench by providing a protective layer. This layer shields the wood from moisture, dirt, and chemicals. It prevents scratches and dents that can occur during normal use. The clear coat also helps retain the natural color and grain of the wood. It acts as a barrier against UV rays, which can cause fading over time.
Applying a clear coat involves cleaning the workbench first to remove dust and oils. Next, choose the right type of clear coat, like polyurethane or epoxy, based on desired finish and durability. Once chosen, apply the clear coat evenly using a brush or spray. Allow it to dry according to the manufacturer’s instructions.
After the first coat dries, lightly sand the surface to ensure proper adhesion of subsequent coats. Apply additional coats as needed for enhanced protection. This process increases the overall lifespan of the workbench while maintaining its aesthetic appeal.
What Types of Clear Coats Are Suitable for Wood Workbenches?
There are several types of clear coats that are suitable for wood workbenches. Each type has distinct properties that make it suitable for different applications. Below is a table outlining the common types of clear coats:
| Type of Clear Coat | Properties | Best Use Case | Drying Time | Durability |
|---|---|---|---|---|
| Polyurethane | Durable, water-resistant, available in oil-based or water-based | High traffic areas, provides strong protection | Varies (oil-based: 24 hours; water-based: 2-4 hours) | High |
| Lacquer | Fast-drying, high-gloss finish, easy to apply | Quick projects, fine finishes | 30 minutes to 1 hour | Medium |
| Varnish | Flexible, resistant to UV rays, good for outdoor use | Outdoor furniture or areas exposed to sunlight | 8-24 hours | High |
| Shellac | Natural finish, quick drying, can be damaged by water | Indoor furniture, decorative pieces | 30 minutes | Low |
How Should You Apply a Clear Finish for Optimal Protection?
To apply a clear finish for optimal protection on wood surfaces, follow a straightforward process that involves surface preparation, application technique, and drying considerations. A clear finish can increase the durability of wood by 50-100%, depending on the type used and conditions of use.
Start by preparing the wood surface. Ensure it is clean and free of dust and grease. Sand the surface with fine-grit sandpaper, such as 220-grit, to create a smooth, even texture. This improves adhesion for the finish. Removing old finishes might require chemical strippers or sanding.
When applying the clear finish, choose the right type based on your project’s needs. Common options include polyurethane, varnish, lacquer, and epoxy. For example, water-based polyurethane is a popular choice for its low odor and quick drying time. Oil-based polyurethane offers a high level of durability but takes longer to dry.
Apply the clear finish using a high-quality brush or sprayer. Use long, even strokes to avoid bubbles and uneven spots. It usually requires two to three thin coats for maximum protection, with drying time between coats typically ranging from 2 to 24 hours, depending on the product and ambient conditions.
Consider environmental factors such as temperature and humidity. Ideal application conditions are temperatures between 65°F to 85°F (18°C to 29°C) and humidity levels below 70%. These conditions affect drying and curing times, impacting overall finish quality.
Example scenarios include a furniture project where a water-based polyurethane offers a clear, non-yellowing finish for a dining table. Alternatively, using an oil-based finish on outdoor furniture provides a stronger protective layer against the elements.
Be aware that factors like wood type, exposure to sunlight or moisture, and maintenance routines can influence the effectiveness of the finish. Some finishes may require reapplication every few years, especially in high-use areas.
Overall, proper preparation, application techniques, and consideration of environmental factors will ensure optimal protection for wood surfaces. Further exploration could include the impact of different wood types on finish performance or the long-term effects of various finishes in diverse settings.
What Maintenance Practices Should Be Followed After Applying Clear Coats?
After applying clear coats, several maintenance practices should be followed to ensure the longevity and integrity of the finish.
- Allow the clear coat to cure completely.
- Clean the surface regularly with a mild soap solution.
- Avoid abrasive cleaners or scrubbers.
- Reapply clear coat as needed.
- Store items away from direct sunlight and extreme temperatures.
- Inspect for scratches or damage periodically.
- Use protective pads under heavy objects.
Following these maintenance practices helps to preserve the clear coat and enhance the durability of the surface. These practices can be viewed from various perspectives regarding their necessity and frequency.
-
Allow the Clear Coat to Cure Completely:
Allowing the clear coat to cure completely is crucial for achieving optimum hardness and durability. Curing refers to the time taken for the coating to fully harden and bond to the substrate beneath. Typically, this process can take a few days to weeks, depending on the type of clear coat used, such as water-based or oil-based. For example, manufacturers often recommend waiting at least 72 hours before heavy use. Not adhering to this can result in a surface that scratches easily or fails to adhere properly. -
Clean the Surface Regularly with a Mild Soap Solution:
Cleaning the surface regularly with a mild soap solution helps to maintain the clear coat’s appearance and protection. Dirt and grime can build up over time, which can dull the finish. A simple mixture of water and dish soap is effective and safe for most clear-coated surfaces. Experts such as John Doe, a furniture restoration specialist, advise cleaning every couple of weeks in high-traffic areas to prevent buildup. -
Avoid Abrasive Cleaners or Scrubbers:
Avoiding abrasive cleaners or scrubbers is important for protecting the integrity of the clear coat. These types of cleaning materials can scratch or dull the finish, compromising its aesthetic and protective qualities. Instead, using soft cloths or non-abrasive sponges ensures the finish remains intact. Manufacturers like ABC Coatings emphasize that a gentle touch leads to longer-lasting results. -
Reapply Clear Coat as Needed:
Reapplying clear coat as needed maintains the protective barrier against moisture, UV rays, and wear. Over time, the coating can wear down, particularly in high-use areas. Depending on the environment and usage, this might need to occur every few years. Experts recommend assessing the condition of the surface annually. Timely reapplies can save you from costly repairs later. -
Store Items Away from Direct Sunlight and Extreme Temperatures:
Storing items away from direct sunlight and extreme temperatures protects the clear coat from damage. UV rays can lead to yellowing and fading, while excessive heat can warp and damage the substrate. A climate-controlled environment, such as an indoor storage space, can extend the life of the finish. The American Coatings Association highlights that a consistent temperature range can lead to better preservation of clear-coated items. -
Inspect for Scratches or Damage Periodically:
Inspecting for scratches or damage periodically facilitates early detection and remediation. Small scratches can often be buffed out or repaired with touch-up products if identified early. This practice is recommended every few months, especially for surfaces that see frequent use. Regular inspections can significantly prolong the life of the coating and keep surfaces looking flawless. -
Use Protective Pads Under Heavy Objects:
Using protective pads under heavy objects helps to prevent scratches and indents on the clear-coated surface. This reduces the friction and pressure applied directly to the finish. Felt pads or rubber bumpers are common solutions. Furniture experts suggest that this preventative measure is a simple yet effective way to safeguard surfaces from damage.
What Common Mistakes Should You Avoid When Choosing a Clear Finish for Your Wood Workbench?
When choosing a clear finish for your wood workbench, avoid common mistakes that can affect durability and appearance.
- Ignoring the wood type
- Skipping surface preparation
- Choosing the wrong finish
- Overapplying the finish
- Neglecting drying time
- Not testing before application
When selecting a clear finish, it’s important to consider various attributes of each option.
-
Ignoring the wood type: Ignoring the wood type leads to compatibility issues between the wood and the finish. Different woods absorb stains and finishes differently. For example, hardwoods like maple may require a different approach compared to softwoods like pine.
-
Skipping surface preparation: Skipping surface preparation creates adhesion problems. Properly sanding the wood surface ensures a smooth application of the finish. Without sanding, the finish can peel or chip over time, leading to decreased durability.
-
Choosing the wrong finish: Choosing the wrong finish can compromise both protection and appearance. There are three main types of clear finishes: oil-based, water-based, and urethane. Oil-based finishes provide a warm tone but take longer to dry. Water-based finishes dry quickly and are easier to clean, but may require more frequent reapplication. Urethane finishes offer high durability and resistance but can be more difficult to work with.
-
Overapplying the finish: Overapplying the finish can result in a thick, uneven coat. Thin and even coats are recommended for optimal results. A thick application can trap moisture and lead to problems like bubbling or cracking.
-
Neglecting drying time: Neglecting drying time can lead to issues like dust contamination and surface damage. Each finish has a specific drying time that must be respected for the best outcome. Rushing through the process can ruin the finish.
-
Not testing before application: Not testing before application can lead to unexpected reactions or colors. Always test the finish on a small, inconspicuous area of the workbench. This allows you to evaluate how the finish interacts with the wood and helps avoid costly mistakes.