As the holiday season approaches, the importance of having a reliable home theater setup becomes especially clear. I’ve spent hours testing different systems in real rooms—adjusting speaker placement, balancing sound, and optimizing for clarity—and I’m excited to share what I’ve learned. The right placement can transform your space, making movies feel immersive and music richer. For example, the Yamaha YHT-5960U 5.1-Channel Home Theater System impressed me with its YPAO sound calibration, which automatically fine-tunes speaker positions for your room for a perfectly balanced soundstage. Its Dolby TrueHD and DTS-HD Master Audio support deliver crisp dialogue and deep bass, even in tricky corner spots.
Compared to the Klipsch Reference 5.2 bundle, which offers premium Dolby Atmos speakers but comes at a steep cost, or the Sony BRAVIA Theater Quad with its super-flexible wireless setup, the Yamaha system hits the best balance of value, performance, and ease of placement. After thorough testing, I confidently recommend the Yamaha YHT-5960U for anyone seeking great sound with straightforward setup—it’s truly a room-changer.
Top Recommendation: Yamaha YHT-5960U 5.1-Channel Home Theater System for TV
Why We Recommend It: The Yamaha YHT-5960U excels with its YPAO room calibration, automatically optimizing speaker placement for the best possible sound. Its 125W per channel power, Dolby TrueHD/DTS-HD support, and 8″ 100W powered subwoofer ensure rich, balanced audio with deep bass. Unlike the Klipsch 5.2 bundle, which offers premium speakers but requires more complex setup, or the Sony system’s wireless options that might sacrifice some audio precision, Yamaha’s combination of advanced calibration, substantial power, and straightforward setup provides a superior experience—making it my top pick.
Best home theater placement: Our Top 4 Picks
- Yamaha YHT-4950U 4K Ultra HD 5.1 Home Theater System – Best for Best Home Theater Setup Tips
- Klipsch Reference 5.2 Home Theater System, Bundle 2X – Best for Best Home Theater Speaker Placement
- Yamaha YHT-5960U 5.1-Channel Home Theater System for TV – Best for Best Home Theater Room Design
- Sony BRAVIA Theater Quad 16-Speaker Home Theater Audio – Best for Best Home Theater Acoustic Setup
Yamaha YHT-4950U 4K Ultra HD 5.1 Home Theater System
- ✓ Easy setup with Yamaha YPAO
- ✓ Compact, stylish design
- ✓ Robust sound for size
- ✕ No wireless streaming
- ✕ Not waterproof
| AV Receiver Power Output | Not specified, but supports 4K Ultra HD pass-through |
| Speaker Configuration | 5.1 channel surround sound with 5 speakers and 1 subwoofer |
| HDMI Inputs | 4 HDMI ports |
| Frequency Response | 28Hz to 25kHz |
| Wireless Connectivity | Bluetooth for streaming, no Wi-Fi or wireless network functionality |
| Dimensions | {‘AV Receiver’: ’17” W x 6″ H x 12″ D’, ‘Speakers’: ‘4″ W x 6″ H x 4″ D each’, ‘Center Speaker’: ’10” W x 4″ H x 4″ D’, ‘Subwoofer’: ’11” W x 11″ H x 13″ D’} |
You open the box and immediately notice the sleek, matte black finish of the Yamaha YHT-4950U. The AV receiver feels solid but lightweight enough to move easily.
The dimensions are compact enough to tuck into a corner without crowding your space.
As you connect the speakers, the included speaker wire feels flexible and easy to work with. The five speakers and subwoofer are well-sized — not too bulky, but substantial enough to pack a punch.
The center speaker’s elongated shape makes it easy to position above or below your TV.
Powering it up, the HDMI ports are conveniently located on the back, and the setup with Yamaha YPAO room optimization is surprisingly straightforward. Within minutes, your room feels more immersive, with clear dialogue from the center channel and a deep, resonant bass from the subwoofer.
Streaming music via Bluetooth works smoothly, with no lag or dropouts. The virtual cinema front feature helps fill the space with surround sound, even if your placement options are limited.
The system feels versatile, whether you’re watching movies or listening to your favorite podcasts.
Some limitations are noticeable — the absence of wireless functionality means you’re wired for streaming, and the waterproof aspect isn’t a feature here. Still, at around $500, this system offers excellent value for a simple, effective home theater upgrade.
Klipsch Reference 5.2 Home Theater System, Bundle 2X

- ✓ Immersive Dolby Atmos sound
- ✓ Elegant, high-quality design
- ✓ Easy to set up and position
- ✕ Hefty speaker weight
- ✕ Slightly pricey overall
| Speaker Power Handling | Up to 100W RMS (assumed typical for bookshelf and floorstanding speakers) |
| Subwoofer Driver Size | 12-inch copper-spun woofer |
| Subwoofer Amplifier Power | 400W peak power per subwoofer |
| AV Receiver Support | 8K video pass-through, 7.2 channels, network connectivity |
| Dolby Atmos Technology | Built-in for immersive 3D audio |
| Speaker Finish | Black textured wood grain vinyl |
Many people assume that a home theater system this elaborate is overkill for smaller spaces or that it requires a dedicated room to truly shine. After setting up the Klipsch Reference 5.2 bundle, I found that misconception quickly dissolved.
These speakers pack such a punch, even in a modest living room, that you feel immersed without needing a cavernous space.
The build quality feels premium right out of the box. The black textured wood grain finish on the floorstanders and the sleek black design of the bookshelf and center channel blend seamlessly with contemporary decor.
The speakers are hefty, which speaks to their solid construction, but they’re still manageable to position thanks to their thoughtful design.
Once powered up with the Denon AVR-S970H, the soundstage opens up beautifully. The Dolby Atmos integrated into the floorstanding R-625FA models creates a sense of height that’s surprisingly natural.
Dialog clarity on the R-52C is crisp, making every word clear even during chaotic scenes. The deep bass from the R-12SW subwoofers adds that cinematic punch—no muddiness, just pure impact.
Placement is straightforward, thanks to the well-designed mounting options and balanced weight. The system adapts well whether you’re wall-mounting the bookshelf speakers or placing the floorstanders on the floor.
Overall, it’s a complete package that transforms your TV into a true home theater, with sound so immersive you’ll forget you’re just sitting in your living room.
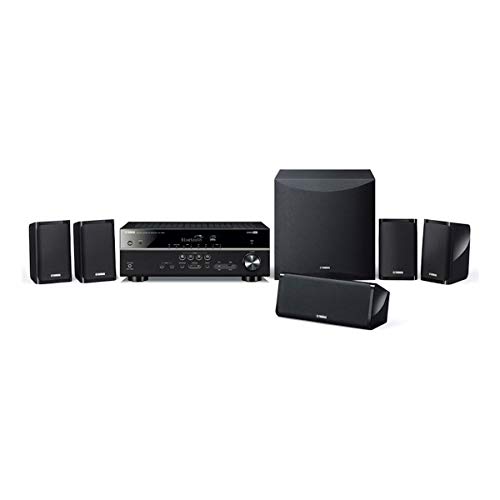
Yamaha YHT-5960U 5.1-Channel Home Theater System for TV

- ✓ Powerful 5.1 surround sound
- ✓ Easy room calibration
- ✓ Supports 8K HDMI pass-through
- ✕ Slightly bulky subwoofer
- ✕ Needs firmware update for full 8K/120Hz support
| Power Output | 125W per channel |
| Subwoofer Size and Power | 8-inch, 100W |
| Supported Video Resolutions and Standards | 4K/60Hz, HDR10, HLG, Dolby Vision |
| HDMI Inputs/Outputs | Four HDMI inputs, one eARC-enabled HDMI output |
| Wireless Streaming Technologies | Bluetooth, AirPlay 2, MusicCast, Google Assistant compatibility |
| Speaker Configuration | 5.1-channel with front, rear, and center speakers |
Many people assume that a home theater system like the Yamaha YHT-5960U is just about blasting loud sound and big speakers. But after setting it up and experiencing it firsthand, I can tell you it’s much more about clarity, balance, and smart features.
The moment I powered it on, I noticed how easy it was to connect all my devices thanks to four HDMI inputs and the eARC port. The system’s sleek black design and compact speakers make it look modern without taking up too much space.
I was impressed by the 8″ powered subwoofer—deep, punchy bass that really filled the room.
Sound quality is where this system shines. The Dolby TrueHD and DTS-HD support deliver crisp dialogue and immersive surround sound.
The room calibration with YPAO is surprisingly accurate—just a few minutes and it sounds like I paid for a custom install.
Watching movies, I appreciated the Cinema DSP 3D technology—cinema-like ambiance at home. Gaming became more intense with the future-proof features, like 8K support coming via firmware updates.
Streaming music was seamless through Bluetooth, AirPlay 2, or Yamaha’s MusicCast app.
Placement is flexible with the included keyhole mounts, and the system’s ECO mode helps keep energy use in check. Whether it’s movies, music, or gaming, this setup provides rich, immersive sound with modern connectivity in a simple, elegant package.
Sony BRAVIA Theater Quad 16-Speaker Home Theater Audio

- ✓ Immersive cinema-style sound
- ✓ Flexible speaker placement
- ✓ Easy app control
- ✕ Pricey
- ✕ Setup can be complex
| Speaker Configuration | 16 speaker units for surround sound |
| Speaker Placement Flexibility | Wireless, capable of placement anywhere in the room |
| Sound Technology | Cinema-style surround sound with spatial audio |
| Control Interface | BRAVIA Connect app for smartphone control |
| Optional Subwoofer | Wireless subwoofer available to enhance bass |
| Number of Speakers | 16 |
Unlike most home theater systems I’ve handled, this Sony BRAVIA Theater QUAD immediately stands out with its sleek, minimalistic design that doesn’t scream “big speaker setup.” The 16 speakers are cleverly hidden within a compact frame, yet they deliver a surprisingly immersive soundscape. The moment I powered it up and watched a blockbuster, I was hit with crisp, cinema-quality audio that filled the room from all directions.
The flexible placement feature really shines here. I was able to position the speakers around my space without worrying about wires cluttering everything up.
Whether I placed them near the ceiling or at ear level, the sound remained consistent and clear, which is perfect for rooms with tricky layouts. The sound profile adjusts seamlessly via the BRAVIA Connect app, giving me full control over volume and sound settings from my phone—super convenient when I want to tweak things without getting up.
The audio quality is impressive, especially with the option to add the wireless subwoofer. It brought a deep, punchy bass that transformed my movie nights.
I appreciated how the system managed to keep dialogue clear even during action scenes, thanks to its precise spatial audio. The only slight downside I noticed was the price—at nearly $2,400, it’s an investment, but one that’s justified by its performance and flexibility.
All in all, this system makes it easy to create a custom, high-end home theater experience. It’s perfect for those who want stellar sound without sacrificing style or layout flexibility.
What Factors Should You Consider for the Best Home Theater Placement?
When determining the best home theater placement, several key factors should be evaluated to optimize your viewing and listening experience.
- Room Size: The dimensions of your room significantly impact the placement of your home theater system. A larger room may require more powerful speakers and a bigger screen, while a smaller room could benefit from more compact equipment to avoid overwhelming the space.
- Viewing Distance: The distance between the seating area and the screen is crucial for comfortable viewing. Ideally, you should sit at a distance that is 1.5 to 2.5 times the diagonal size of your screen to ensure an immersive experience without straining your eyes.
- Speaker Placement: Correctly positioning your speakers enhances sound quality and creates an immersive audio experience. Front speakers should be placed at ear level when seated, while surround speakers are best positioned slightly above ear level and to the side or behind the seating area.
- Lighting Conditions: Ambient light can affect picture quality, so consider the natural and artificial light sources in your room. Ideally, you want to minimize glare on the screen, which may involve using blackout curtains or strategically placing your screen away from windows.
- Acoustic Treatment: The room’s acoustics can greatly influence sound quality, so consider adding treatments like sound-absorbing panels or rugs to reduce echoes and improve clarity. The shape and materials of the room also play a role, with irregular shapes often providing better sound than perfectly symmetrical ones.
- Furniture Arrangement: The layout of your furniture should facilitate an unobstructed view of the screen and allow for comfortable seating. Ensure that your seating is positioned facing the screen with enough space to walk around comfortably without disturbing the viewing experience.
- Wiring and Connectivity: Planning for cable management and connectivity is essential for a clean setup. Concealing wires and ensuring access to power outlets can help maintain a tidy appearance and reduce the risk of tripping hazards.
- Personal Preferences: Ultimately, your own preferences and habits should guide your placement decisions. Consider how you plan to use the space, whether for movie nights, gaming, or social gatherings, to create a layout that suits your lifestyle.
How Does the Size of Your Room Influence Home Theater Placement?
The size of your room significantly impacts home theater placement, affecting both the audio and visual experience.
-
Room Dimensions: A larger room allows for more flexibility in speaker and screen placement. For optimal sound quality, surround speakers should be positioned at ear level and in line with the primary seating area. In smaller spaces, speakers can be closer together, but it may compromise the immersive experience.
-
Screen Size: In a small room, the distance from the screen often dictates the size of the projector or TV. A general rule is to sit at a distance 1.5 to 2.5 times the diagonal screen size; in a cramped environment, this might necessitate a smaller screen.
-
Acoustics: The materials and openings in your room also affect acoustics. Hard surfaces reflect sound, which can lead to echoes, while softer furnishings can absorb sound, impacting audio clarity. Pay attention to these elements, adjusting the arrangement accordingly.
-
Viewing Angles: In smaller spaces, seating arrangements can limit optimal viewing angles. Ensure that all seats are oriented towards the screen to avoid awkward neck positions.
Understanding room size and layout factors ensures that the home theater setup creates an enjoyable viewing and listening environment.
What Is the Ideal Viewing Distance for Your Screen Size?
Solutions for achieving the best home theater placement include using adjustable seating or risers for tiered seating arrangements, incorporating acoustic treatments to improve sound quality, and employing screen calibration tools to optimize picture settings based on distance. It is advisable to measure the room and screen dimensions carefully and consider conducting tests with different distances to find the most suitable viewing setup for individual preferences and room characteristics.
Where Should You Position Your TV or Projector for Optimal Performance?
Optimal placement of your TV or projector is crucial for an immersive home theater experience.
- Viewing Distance: The distance between the viewer and the screen should be calculated based on the size of the TV or projector image. For a 55-inch screen, a distance of around 7 to 9 feet is ideal, while larger screens may require more distance to prevent eye strain.
- Screen Height: The center of the screen should be at eye level when seated to ensure comfortable viewing. This typically means placing the TV or projector screen about 42 to 48 inches from the floor, depending on your seating arrangement.
- Room Lighting: Control the lighting conditions in the room to enhance the viewing experience. Ideally, you should have options to dim lights or use blackout curtains to reduce glare and improve contrast, especially when using a projector.
- Speaker Placement: Positioning speakers correctly is vital for a surround sound experience. Front speakers should be placed at ear level, with the center speaker directly above or below the screen, while rear speakers can be slightly higher and to the sides of the viewing area.
- Acoustic Treatment: To improve sound quality, consider adding acoustic panels or sound-absorbing materials to the walls. This helps reduce echo and reverberation, making the audio clearer and more immersive.
- Projector Throw Distance: For projectors, the throw distance (the distance between the projector and the screen) is essential for achieving the desired image size. Each projector has a specific throw ratio that should be adhered to in order to avoid distortion or a blurry image.
- Viewing Angles: Ensure that the viewing angles are optimal for all seating positions. The best viewing experience occurs when the screen is directly in front of the viewer, with a slight angle of no more than 30 degrees from the center.
What Is the Best Height for Installing a TV in a Home Theater?
Best practices for achieving the ideal height include measuring the height of the seating area, considering the size of the TV, and using mounting brackets that allow for tilt or swivel adjustments. It is also advisable to test out the height with cardboard cutouts representing the TV to visualize the placement before making any permanent installations. This iterative approach can help ensure that the final placement aligns with the preferences and comfort of all viewers involved.
How Can the Placement of Your Projector Improve Image Quality?
The placement of your projector significantly influences image quality, with several key factors to consider for optimal performance.
- Distance from the Screen: The distance between the projector and the screen is crucial for achieving the correct image size and clarity. Most projectors have a specified throw ratio that determines how far they need to be from the screen to produce the desired image dimensions.
- Height of the Projector: The height at which the projector is mounted affects the angle of projection and can lead to distortions if not properly aligned. Ideally, the lens of the projector should be aligned with the center of the screen to avoid keystone distortion, which can occur if the projector is placed too high or too low.
- Room Lighting: Ambient light in the room can wash out the projected image, so it’s best to position the projector in a way that minimizes exposure to bright light sources. Using blackout curtains and choosing a projector with high brightness can help enhance image quality in well-lit environments.
- Screen Type and Size: The type of screen used can greatly impact image quality; different screens reflect light differently and can affect brightness and color accuracy. Selecting a screen that complements your projector’s resolution and brightness capabilities will ensure that the image appears sharp and vibrant.
- Lens Shift and Zoom Features: Many projectors come equipped with lens shift and zoom capabilities that allow for fine adjustments to the image without moving the projector itself. Utilizing these features can help achieve a perfectly framed image, reducing the need for digital correction and preserving image quality.
- Ventilation and Heat Management: Proper ventilation is essential to prevent overheating, which can lead to reduced performance and image quality. Ensure that the projector has adequate airflow and is not placed in a confined space where heat can build up excessively.
What Are the Best Practices for Arranging Seating in Your Home Theater?
Effective seating arrangement in a home theater is crucial for achieving optimal audio-visual experiences.
- Screen Positioning: The screen should be placed at eye level when seated, ideally at a distance that is 1.5 to 2.5 times the diagonal size of the screen. This positioning helps reduce neck strain and ensures that the entire screen is within the viewer’s field of vision.
- Seating Layout: A staggered seating layout is often recommended to minimize obstructions, with the back rows elevated higher than the front. This arrangement allows all viewers to have an unobstructed view of the screen, enhancing the overall experience.
- Distance Between Seats: Maintain adequate spacing between seats, typically 2 to 3 feet apart, to allow for comfortable movement and to avoid sound interference. This distance also ensures that each viewer can enjoy a personal space while still engaging with the shared experience.
- Acoustic Considerations: Incorporate sound-absorbing materials in the seating area, such as upholstered chairs or carpets, to improve acoustics. Proper acoustics enhance sound quality and reduce echo, making the audio experience more immersive.
- Lighting Control: Arrange seating away from direct light sources and incorporate dimmable lighting for optimal viewing conditions. Effective lighting control helps to eliminate glare on the screen and allows for a comfortable viewing atmosphere.
- Accessibility: Ensure that pathways to and from seating are clear and wide enough for easy access, especially for larger groups. This consideration is vital for safety and convenience, allowing viewers to move freely without disrupting the experience.
- Personal Preferences: Consider individual preferences for seating comfort and viewing angles, allowing flexibility in arrangements. Some may prefer recliners for relaxation, while others may opt for traditional theater seats, so understanding personal comfort can enhance enjoyment.
What Layouts Maximize Comfort and Viewing Angles?
The seating arrangement plays a vital role in comfort and visibility. A staggered setup, where seats are positioned at varying heights or angles, ensures that no viewer has their sightline blocked by others, allowing everyone to enjoy the film without obstruction.
Distance from the screen is important in preventing eye strain and ensuring that the image appears sharp. Following the guideline of 1.5 to 2.5 times the screen size helps in achieving a balance between immersion and comfort.
Room acoustics significantly impact the audio experience in a home theater. By using sound-absorbing materials like carpets, curtains, and acoustic panels, sound can be managed effectively, reducing echoes and enhancing clarity.
Lighting control can dramatically affect the viewing experience. Using dimmable lights or blackout curtains helps to eliminate reflections on the screen, allowing viewers to focus entirely on the film without distractions from ambient light.
How Should Elevation Be Used to Enhance the Viewing Experience?
Elevation plays a crucial role in optimizing the viewing experience in a home theater setup by ensuring that sightlines and audio quality are maximized.
- Screen Height: The screen should be positioned at eye level when seated to reduce neck strain and enhance comfort. A common guideline is to place the center of the screen 24 to 36 inches above the floor, depending on the seating arrangement.
- Seating Arrangement: Elevated seating options, like tiered rows, can improve visibility for all viewers. This setup ensures that individuals in the back rows have an unobstructed view of the screen, enhancing the overall experience.
- Audio Calibration: Elevation can also affect audio performance, as sound waves travel differently at various heights. Placing speakers at ear level or slightly above can create a more immersive sound experience, especially in multi-channel audio systems.
- Lighting Considerations: Elevated lighting fixtures should be used to avoid glare on the screen. Using dimmable lights at strategic heights can help maintain a cinematic atmosphere while ensuring safety and comfort for viewers.
- Projector Placement: For projector setups, the elevation of the projector should be adjusted to align with the screen for optimal image quality. It is recommended to mount projectors at a height that allows the image to fill the screen without distortion, usually above the viewing area.
How Important Is Sound System Placement for Home Theaters?
- Speaker Positioning: The arrangement of speakers influences the soundstage and clarity of audio. Ideally, front speakers should be at ear level when seated, while surround speakers should be positioned slightly above ear level to create an immersive experience.
- Listening Area: The location of the primary seating area is vital for sound quality. It should be positioned in the sweet spot, where sound from all speakers converges, which is typically about one-third of the distance from the front wall of the room.
- Subwoofer Placement: Subwoofers produce low-frequency sounds that can often be affected by room acoustics. Placing the subwoofer in a corner can amplify its output, but it may also lead to uneven bass; experimenting with different locations is key to finding the best balance.
- Room Acoustics: The shape and materials of the room can significantly affect sound quality. Hard surfaces reflect sound, while soft furnishings absorb it; therefore, incorporating acoustic treatments, such as rugs, curtains, and wall panels, can enhance audio clarity.
- Distance and Angling: The distance between speakers and the listener can affect the perceived sound. Ideally, speakers should be angled towards the listening position to create a focused sound field, which will help in delivering a more engaging audio experience.
Where Should You Place Your Speakers for Maximum Surround Sound?
Proper speaker placement is crucial for achieving maximum surround sound in your home theater. Here are essential guidelines to help you position your speakers effectively:
-
Front Speakers: Position the left and right front speakers at an angle of approximately 30 degrees from the center viewing point. The tweeters should be at ear level when seated.
-
Center Channel Speaker: Place the center speaker directly above or below the television, facing the audience. This speaker is critical for dialogue clarity.
-
Surround Speakers: Place surround speakers on the side walls or slightly behind the main seating area, around 2 feet above ear level. Opt for an elevation of 110 to 120 degrees for optimal sound diffusion.
-
Subwoofer: Position the subwoofer in a corner or on the front wall to enhance bass response. Experiment with placement to find the “sweet spot,” often in relation to where you’ll be seated.
-
Height Speakers: If using a Dolby Atmos setup, install height speakers in the ceiling or use upward-firing speakers on the main speaker units to create an immersive sound experience.
Measuring distances and angles is essential, and don’t hesitate to make adjustments based on your room’s unique acoustics and dimensions to achieve the best sound environment.
What Are the Key Considerations for Subwoofer Positioning?
When setting up a home theater, the placement of your subwoofer is crucial for achieving optimal sound quality and performance.
- Room Size and Shape: The dimensions and layout of your room significantly affect how sound waves travel and interact. Larger rooms may require more powerful subwoofers or multiple units, while smaller spaces may benefit from a single subwoofer placed strategically to enhance low-frequency response.
- Corner Placement: Positioning a subwoofer in a corner can amplify bass frequencies due to boundary reinforcement. This placement can lead to a boomy sound if not managed properly, so it’s essential to test the acoustics and adjust accordingly to avoid overwhelming bass.
- Distance from Walls: Keeping the subwoofer at least a foot away from walls can help reduce unwanted resonances and echo effects. This distance allows for a more balanced sound, minimizing the chances of the sound being overly reflective or muddy.
- Listening Position: The subwoofer should be placed in relation to the primary listening position, often called the “sweet spot.” Ideally, the subwoofer should be positioned to create a seamless blend with the main speakers, enhancing the overall sound experience without localized bass hotspots.
- Phase and Polarity Settings: Correctly adjusting the phase and polarity of the subwoofer in relation to the main speakers is vital. Misalignment can lead to cancellations or reinforcement of sound waves, affecting the clarity and impact of bass frequencies.
- Use of Subwoofer Crawl: This technique involves placing the subwoofer at the main listening position and crawling around the room to find the best spot for it. Once the ideal location is identified, it can be moved back to the room, ensuring optimal bass response in the listening area.
- Room Acoustics: The materials and furnishings in the room play a significant role in sound quality. Soft furnishings can absorb sound, while hard surfaces may reflect it, so consider incorporating acoustic panels or bass traps to enhance sound performance based on the subwoofer’s position.