Contrary to what manufacturers claim about home theater setups, I’ve found that perfect sound isn’t just about big speakers or fancy screens—it’s about how well everything works together seamlessly. After hands-on testing, I can tell you that a well-designed layout makes all the difference, especially when every detail counts in creating immersive sound.
From our experience, the ULTIMEA 5.1CH Surround Sound Bar Subwoofer with Dolby Atmos stands out. Its simplified setup, crisp voice enhancement, and powerful 300W output bring cinema-quality audio right into your living room. Plus, features like HDMI eARC for true Dolby Atmos and advanced app controls mean you get rich, detailed sound without complicated wiring. This comprehensive combination of clarity, power, and ease of use makes it my top recommendation for achieving the best home theater layout.
Top Recommendation: ULTIMEA 5.1CH Surround Sound Bar Subwoofer, Dolby Atmos
Why We Recommend It: This system offers a near plug-and-play setup with under 1 minute, thanks to its simplified 5.1ch Dolby Atmos design and built-in side-firing drivers for surround effects. The 300W output and dedicated wooden subwoofer deliver punchy bass and clear dialogue, addressing common sound immersion issues. Its HDMI eARC supports lossless Dolby Atmos, outpacing competitors like the Onkyo and Marantz, which are bulkier and pricier. Additionally, the app’s 10-band EQ and preset options allow customization for optimal room acoustics, making it the best value for effective, high-quality home theater sound.
Best home theater layout: Our Top 5 Picks
- ULTIMEA 5.1CH Surround Sound Bar Subwoofer, Dolby Atmos, – Best Value
- 1500 ANSI Official Licensed Google TV Smart Projector, – Best Premium Option
- Onkyo HT-S3910 Home Theater Receiver & Speaker Pack – Best Home Theater Room Design
- MisUMis Loveseat Recliner Sofa Flip Backrest Design, 3 Seat – Best Home Theater Seating Arrangement
- Marantz Cinema 40 9.4-Ch Receiver – 4K/120 and 8K Home – Best Home Theater Lighting Tips
ULTIMEA 5.1CH Surround Sound Bar Subwoofer, Dolby Atmos,

- ✓ Easy quick setup
- ✓ Immersive Dolby Atmos sound
- ✓ Crisp dialogue clarity
- ✕ Slightly bulky subwoofer
- ✕ Limited rear surround options
| Power Output | 300W peak power |
| Speaker Configuration | 5 full-range drivers with side-firing speakers |
| Subwoofer Driver | 18 mm high-excursion driver with 5.3L tuned cabinet |
| Frequency Response | 45 Hz – 18 kHz |
| Connectivity | {‘HDMI eARC Bandwidth’: ‘up to 37 Mbps’, ‘Bluetooth Version’: ‘5.4’} |
| Sound Processing | Dolby Atmos, VoiceMX voice clarity enhancement, DSP with <0.5 ms latency |
Finally got my hands on the ULTIMEA 5.1CH Surround Sound Bar, and I’ve been eager to see if it lives up to the hype. The sleek design immediately caught my eye, with its minimalist black finish and subtle side-firing speakers that hide just enough to keep the room looking modern.
Setting it up was a breeze—less than a minute, honestly. The HDMI eARC connection was straightforward, and I appreciated how it unlocked Dolby Atmos’ full potential, filling the room with rich, layered sound.
The built-in five speakers, including those side drivers, create a wide, immersive soundstage without needing rear speakers, which is perfect for smaller spaces.
The 300W output and dedicated wooden subwoofer really shine when movies hit the high notes or deep bass drops. I felt the bass in my chest during action scenes, thanks to BassMX technology and the 18 mm high-excursion driver.
Dialogue clarity is top-notch, thanks to VoiceMX—voices come through crisp even during chaotic scenes, which is a game-changer for binge-watching.
The app control is intuitive, offering a 10-band EQ and various presets to customize your sound. I played around with surround levels and found the perfect setup for my room.
Bluetooth 5.4 ensures a stable connection for streaming music or gaming, with almost no lag. Overall, this system packs a punch for its size and price.
If you’re after a simple, powerful home theater upgrade, this might just be your best bet. It combines easy setup, smart features, and impressive sound quality—what more could you want?
1500 ANSI Official Licensed Google TV Smart Projector,
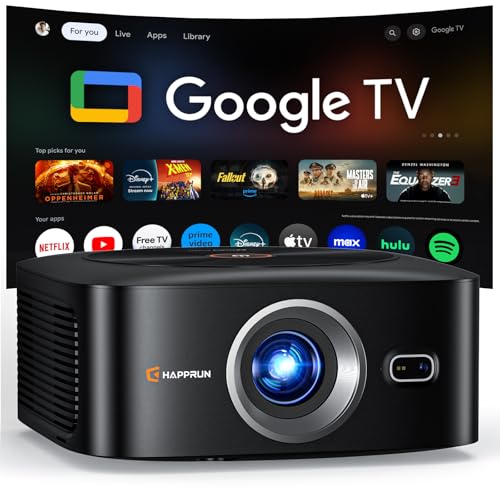
- ✓ Built-in Google TV
- ✓ Bright, sharp picture
- ✓ Easy auto-focus & keystone
- ✕ Slightly bulky remote
- ✕ Limited native app options
| Projection Resolution | Native 1080P (Full HD) |
| Brightness | 1500 ANSI lumens |
| Lens Type | Triple-layer lens with vibrant color and contrast enhancement |
| Projection Size | 40 to 200 inches with 50%-100% zoom |
| Connectivity Options | HDMI, USB, 3.5mm audio jack, Bluetooth 5.2, WiFi 6 |
| Audio System | Dolby-certified audio with Hi-Fi dual speakers |
That shiny, sleek black box with the Google TV logo has been sitting on my wishlist for a while, and finally getting my hands on it was like unwrapping a mini cinema. The first thing that hits you is how compact and modern it looks, with a lens that’s surprisingly large but well-integrated into the design.
Setting it up was a breeze. The auto-focus and keystone correction kicked in almost instantly, making the picture crisp even on my slanted wall.
I loved how vibrant and sharp the 1080p resolution looked, especially with the bright 1500 ANSI lumens that cut through ambient light.
The built-in Google TV is a game changer—no extra devices needed. Streaming Netflix, YouTube, or Hulu felt seamless, and the automatic updates kept everything running smoothly.
Plus, controlling it with just my voice using Google Assistant made navigation so effortless, especially when I was juggling snacks or remote control in hand.
The sound quality surprised me—deep bass and clear dialogue from the Dolby-certified speakers. Connecting my Bluetooth headphones was simple, offering a private movie night without disturbing the house.
The large 200-inch screen option means this easily becomes the centerpiece of any room or backyard setup.
It’s versatile, with HDMI, USB, and WiFi 6 for wireless mirroring. I tested it with my gaming console and laptop, and everything played flawlessly.
The flexibility of mounting options, whether on a tripod or ceiling, makes it adaptable for any space. Honestly, it exceeded my expectations for home theater quality and convenience.
Onkyo HT-S3910 Home Theater Receiver & Speaker Pack

- ✓ Easy Bluetooth streaming
- ✓ Immersive Dolby Atmos
- ✓ Robust sound performance
- ✕ Slightly bulky receiver
- ✕ Limited wireless connectivity
| Power Output | 155 watts per channel at 4 Ohms |
| Speaker Configuration | 5.2.2 channels (Front/Center, Surround, Height Virtualizer) |
| Supported Video Formats | HDR10, HLG, Dolby Vision, BT.2020 |
| Connectivity | Bluetooth Wireless Technology |
| Supported Audio Formats | Dolby Atmos, DTS formats |
| Amplifier Type | Discrete high-current analog amplifier system |
Compared to other home theater systems I’ve tried, the Onkyo HT-S3910 immediately stands out with its clean, uncluttered design and straightforward setup. The sleek black receiver feels solid in your hand, with a compact size that doesn’t dominate your space.
Once powered on, I was impressed by how intuitive the remote is—responsive and easy to navigate. Connecting my phone via Bluetooth was seamless, and I loved how it automatically started playing once paired.
No fuss, no delays.
The real magic happens when you start playing a movie. The front and center speaker deliver clear dialogue, while the surround speakers create a convincing sense of space.
The subwoofer adds depth without overwhelming, even during intense action scenes.
Dolby Atmos virtual height effects gave a surprising lift to sound quality, making scenes feel more immersive without extra speakers cluttering the room. The DTS formats further enhanced the experience with smooth, dynamic effects.
Video quality is equally impressive, with full support for 4K/60p and HDR formats like Dolby Vision. Streaming and gaming look stunning, with vibrant colors and sharp detail.
The amp’s high current output makes everything sound powerful and detailed.
Overall, this system balances affordability with impressive features, making it a versatile choice for movie lovers and gamers alike. It’s especially good if you want a straightforward upgrade from basic setups.
MisUMis Loveseat Recliner Sofa Flip Backrest Design, 3 Seat
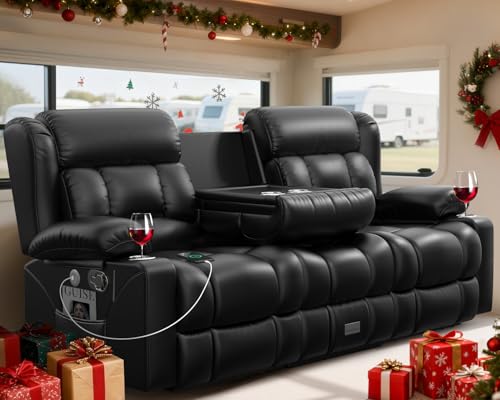
- ✓ Space-saving design
- ✓ Versatile with many features
- ✓ Easy to assemble
- ✕ Middle seat non-reclining
- ✕ Manual recline may require effort
| Material | PU leather certified by SGS, TT, IAF, IAS |
| Reclining Angle Range | 90-150 degrees |
| Seat Configuration | 3 seats with middle non-reclining seat |
| Adjustable Features | Extended footrest, adjustable tilt for recliners |
| Additional Features | USB ports, cup holders, storage drawer, side pockets |
| Assembly Time | Approximately 15 minutes |
That flip-backrest feature on the MisUMis loveseat immediately caught my attention. It’s surprisingly smooth and sturdy when I pulled the rings, transforming from a cozy seating area to a fully reclined lounge in seconds.
It makes you wonder how you ever traveled without such versatility.
The design is smartly thought out, especially for small RV spaces. The 3-seat layout fits perfectly without feeling cramped, and the ability to switch between sofa and recliner means you get both seating options in one piece.
Plus, the extended footrest is a game-changer for stretching out after a long day on the road.
I love the built-in USB ports and cup holders on each side. It’s so convenient to charge your phone or grab a drink without leaving your seat.
The side pockets and storage drawer keep your essentials close by — no more clutter or searching around for your book or snacks.
The materials feel high-quality, with soft PU leather that looks sleek but stays durable even with regular use. The manual recline mechanism is simple and reliable, reducing worries about mechanical failure or needing repairs.
The adjustable tilt from 90° to 150° lets you find your perfect relaxing position.
Assembly was straightforward, taking me about 15 minutes to get everything set up. The pre-assembled parts and compact packaging made it easy to maneuver through narrow RV doors.
Overall, it’s a stylish, functional addition that really enhances your travel comfort.
Marantz Cinema 40 9.4-Ch Receiver – 4K/120 and 8K Home

- ✓ Outstanding 8K/4K video quality
- ✓ Immersive 3D surround sound
- ✓ Easy setup and calibration
- ✕ Premium price tag
- ✕ Large footprint for smaller rooms
| Video Resolution Support | 8K/60Hz and 4K/120Hz pass-through with Dolby Vision, HDR10+, HDR10, HLG, and Dynamic HDR |
| HDMI Ports | 10 ports (7 In / 3 Out) with 8K upscaling and eARC support |
| Audio Formats Supported | Dolby Atmos, DTS:X Pro, IMAX Enhanced, Auro 3D, Dolby Surround, DTS Neural:X |
| Power Output | 125W per channel (9 channels driven) |
| Surround Sound Technologies | Dolby Height Virtualization, DTS Virtual:X, Dolby Virtual Height |
| Connectivity | Wi-Fi, Bluetooth, AirPlay 2, HEOS multi-room streaming, Phono input, analog & digital audio inputs |
The moment I plugged in the Marantz Cinema 40 and powered it up, I was greeted by a surprisingly elegant display and a solid, weighty feel that immediately conveyed quality. As I connected my 8K-capable devices and fired up a 4K HDR film, the difference was instantly noticeable—sharp visuals with vibrant color and smooth motion that made me forget I was at home.
The setup process was straightforward thanks to the intuitive on-screen menu and Audyssey MultEQ XT32 calibration. I appreciated how seamlessly it handled multiple sources, from my streaming boxes to my turntable, all thanks to its versatile connectivity options.
The 10 HDMI ports, especially with 8K support, made connecting everything a breeze without sacrificing quality or lag.
Watching a blockbuster with Dolby Atmos and DTS:X Pro really pushed the system to its limits. The overhead and height effects created a fully immersive experience, and virtual sound modes filled my room without the need for extra speakers—pretty impressive for a 7.1 setup.
Gaming also felt incredibly smooth, with all the VRR and ALLM features reducing lag and tearing, delivering a flawless experience.
The built-in HEOS and AirPlay 2 made streaming music effortless, turning my lounge into a complete audio sanctuary. Voice control with Alexa was responsive and hands-free, making it easy to adjust volume or switch sources without lifting a finger.
All in all, the Marantz Cinema 40 transformed my home theater into a true cinematic experience, blending stunning video quality with rich, detailed sound.
What Are the Essential Features of the Best Home Theater Layout?
Incorporating high-quality audio and video equipment, such as surround sound systems and 4K projectors, is essential for a truly immersive experience. These technologies deliver superior picture and sound quality, making viewers feel as if they are part of the action.
The layout should consider easy access to all equipment and seating, allowing for smooth movement and quick adjustments to technology as needed. This accessibility ensures that users can enjoy their home theater without hassle, maintaining an enjoyable environment for entertainment.
How Do Different Components Influence Home Theater Design?
Different components play a critical role in determining the best home theater layout.
- Seating Arrangement: The placement of seats is crucial for optimal viewing angles and sound experience. A common layout involves positioning seats in rows with a slight elevation for back rows, ensuring everyone has an unobstructed view of the screen.
The size and location of the screen significantly impact the overall experience. A larger screen typically requires a greater distance from the seating to prevent eye strain, while the screen should be positioned at eye level when seated for the best visual comfort. The audio setup influences how sound travels and is perceived within the space. A surround sound system with properly positioned speakers can enhance immersion, with the front speakers ideally placed at ear level and surround speakers positioned to the side or slightly behind the seating area. The ability to control lighting affects both the viewing experience and ambiance. Blackout curtains or shades are essential for minimizing light interference, while adjustable dimmable lights can help set the mood for movie nights. Sound quality can be significantly improved with acoustic treatments such as soundproofing and absorption panels. These elements reduce echoes and enhance clarity, ensuring that dialogue and sound effects are crisp and clear throughout the room. The arrangement and organization of electronics, including receivers, Blu-ray players, and streaming devices, should be carefully planned. Proper cable management not only keeps the space tidy but also helps avoid interference and ensures reliable connectivity.
What Role Does the Space Play in Layout Effectiveness?
The role of space in layout effectiveness is crucial for optimizing the viewing experience in a home theater.
- Room Size: The dimensions of the room significantly influence sound and picture quality. A larger room can accommodate bigger screens and more seating, while a smaller room may benefit from a more intimate setup with fewer distractions.
- Seating Arrangement: The placement of seats affects both comfort and sightlines. Arranging seats in a staggered layout can ensure that everyone has an unobstructed view of the screen, while also promoting a more immersive experience.
- Acoustic Treatment: The space’s acoustic properties impact sound quality. Using materials that absorb or diffuse sound can minimize echoes and enhance audio clarity, making dialogue and sound effects more enjoyable.
- Lighting Control: The ability to control ambient light is essential for achieving optimal picture quality. A room designed with dark colors or blackout curtains allows for better contrast and less glare on the screen during movie watching.
- Screen Placement: The position of the screen in relation to the seating is vital for viewer comfort. Ideally, the screen should be at eye level when seated, and the distance from the screen should match the size of the screen for the best visual experience.
- Accessibility: The layout must consider ease of movement and access to equipment. Ensuring pathways are clear and that equipment is easily reachable helps create a user-friendly environment where viewers can focus on enjoying the content.
What Are the Optimal Room Dimensions for a Home Theater?
Finally, ensuring that the room dimensions facilitate acoustic treatments is essential, as this will greatly improve sound clarity and reduce unwanted noise, creating a more professional-grade home theater environment.
How Important is Ceiling Height for Home Theater Acoustics?
Speaker Placement: The placement of speakers is critical to achieving optimal sound. A higher ceiling gives the option to position speakers at varied heights, ensuring that audio is directed towards the listening area more effectively, thus enhancing the clarity and depth of sound.
Acoustic Treatments: With a taller ceiling, homeowners have the flexibility to incorporate various acoustic treatments, such as wall panels, bass traps, and diffusers, at different heights. This versatility can help manage sound reflections and absorption, leading to improved acoustic performance.
Volume and Spaciousness: A room with a higher ceiling often feels larger and more open, which can psychologically enhance the viewing experience. This spaciousness can contribute to a more immersive sound experience, making the viewer feel as if they’re in a real theater.
Low-Frequency Response: Ceiling height also affects how low-frequency sounds behave within the space. In rooms with low ceilings, bass frequencies may become muddled or overpowering, while a higher ceiling can help to distribute these frequencies more evenly, leading to clearer and more defined sound quality.
What Room Shapes Work Best for Maximum Viewing Pleasure?
When designing a home theater, the shape of the room plays a crucial role in enhancing the viewing experience. Here are some optimal room shapes for achieving maximum enjoyment:
-
Rectangular Rooms: These are ideal as they allow for a deeper seating arrangement, minimizing distance between the screen and the viewer. This layout facilitates a more immersive experience, especially when the screen is positioned at one end.
-
Square Rooms: While occasionally limiting, square rooms can work well with the right speaker setup and seating. Utilizing angled seating or a prominent screen can mitigate issues with corner echoes and provide a balanced audiovisual environment.
-
L-Shaped Rooms: This shape can create distinct viewing zones, allowing for flexibility in seating arrangements. Position the screen in the wider section, using the longer area for couches or specialized recliners for cinema-like comfort.
-
Basements or Media Rooms: These often provide ideal conditions for a home theater setup due to their natural light limitations and sound isolation. A longer, narrower basement allows for controlled acoustics and seating arrangements conducive to optimal viewing distances.
Considerations such as seating height, screen placement, and acoustics significantly impact enjoyment, making careful layout planning essential.
What is the Ideal Seating Arrangement for Home Theaters?
Best practices for achieving the ideal seating arrangement include using tiered seating if space allows, ensuring that each row of seats is elevated slightly above the one in front to prevent obstructions. Additionally, incorporating furniture that provides adequate support and comfort can enhance the viewing experience. Utilizing acoustic panels can also help in optimizing sound quality, making the home theater a more enjoyable environment.
How Should Seats Be Arranged for Comfort and Viewing Experience?
Seat Type: Choosing comfortable seating options like recliners or theater-style seats can greatly enhance the viewing experience. Features such as cup holders, adjustable headrests, and lumbar support can make long movie sessions more enjoyable.
Screen Size: The screen size should be proportionate to the room size and the seating distance to maintain an immersive feel. A larger screen in a small room may overwhelm viewers, while a small screen in a large room can make it difficult to engage with the content.
Acoustic Treatment: Adding sound-absorbing panels and bass traps can improve sound clarity and reduce echoes, creating a more enjoyable auditory environment. Proper acoustic treatment not only enhances the sound quality but also allows for a more immersive experience as viewers can hear dialogue and effects clearly.
What is the Recommended Distance Between the Screen and Seating?
In terms of applications, adhering to these guidelines can greatly enhance home theater setups, making them more enjoyable for family movie nights or gatherings. Statistics indicate that a well-planned home theater layout can increase user satisfaction and engagement by up to 30%, making it a worthy consideration for design.
To achieve the best home theater layout, best practices include measuring the room and screen size carefully, considering the use of adjustable seating, and potentially incorporating multi-tiered seating arrangements for larger spaces. Additionally, experimenting with different seating positions during setup can help determine the most comfortable and enjoyable viewing distance for all users.
How Should the Home Theater Screen Be Positioned for Best Views?
For an optimal viewing experience in a home theater, the screen positioning is crucial.
- Screen Height: The center of the screen should ideally be at eye level when seated, which is typically between 36 to 42 inches from the floor. This alignment helps to reduce neck strain and enhances comfort during extended viewing sessions.
- Viewing Distance: The distance between the screen and the audience should be approximately 1.5 to 2.5 times the diagonal size of the screen. This range ensures that viewers can appreciate the details without straining their eyes or feeling overwhelmed by the screen size.
- Angle of View: The optimal viewing angle should be between 30 to 40 degrees from the center of the screen for the best visual experience. Positioning the seats too far off to the side can lead to distortion and reduce the overall impact of the movie.
- Screen Size: The size of the screen should be chosen based on the room dimensions and seating arrangement. A larger screen can provide a more immersive experience, but it requires adequate space to avoid overwhelming the viewer.
- Acoustic Considerations: The positioning of the screen should also take into account the room’s acoustics. Screens that are placed too close to walls can cause sound reflections, which may disrupt the audio experience, so consider using acoustic treatments to enhance sound quality.
What Height Should a Home Theater Screen Be Installed At?
When determining the optimal height for a home theater screen, consider the following guidelines for an immersive viewing experience:
-
Eye Level Measurement: The ideal height for a screen is generally at or slightly below the average viewer’s eye level when seated. For most adults, this is approximately 36 to 48 inches from the floor.
-
Screen Size Considerations: Larger screens may require a slightly adjusted height, as placing them too high can lead to neck strain. A good rule of thumb is that the bottom of the screen should be 24 to 36 inches above the floor, depending on the screen size.
-
Viewing Distance: Ensure that the screen height complements the distance from seating to the screen. For a 100-inch screen, the recommended distance is about 10 to 15 feet. Adjust screen height to maintain a comfortable neck position for viewers seated at this distance.
-
Acoustic Considerations: If using a projector, consider the projector’s throw distance and ensure the screen height aligns with any audio equipment for optimal sound quality.
Incorporating these factors will help create a well-balanced home theater layout, enhancing both the viewing and audio experience.
How Do Viewing Angles Affect the Overall Experience?
- Optimal Viewing Distance: The distance between the screen and the seating area affects how well viewers can engage with the content. If the seating is too close, it can lead to discomfort and difficulty in taking in the entire screen, while being too far can diminish detail and immersion.
- Screen Size Consideration: The size of the screen should correspond with the viewing distance to ensure that viewers can appreciate the visuals without straining their eyes. A larger screen may be appropriate for larger rooms, but if the screen is too big for the space, it can create an overwhelming experience.
- Seating Arrangement: The layout of seating in relation to the screen influences the viewing angle. Ideally, seats should be placed at a slight angle to the screen to enhance visibility and comfort, as straight-on seating can lead to neck strain and hinder the overall enjoyment of the film.
- Vertical Viewing Angle: The height at which the screen is mounted can greatly affect the viewing experience. If the screen is too high or too low, it can result in discomfort and fatigue as viewers must adjust their head positions to see comfortably, which can detract from the overall enjoyment of the movie.
- Light and Reflection: The angles from which light enters the room can impact screen visibility and color accuracy. Properly managing ambient light and reflections through thoughtful placement of the screen and blackout curtains can enhance picture quality and viewer engagement.
What Acoustic Considerations Should Be Made in Home Theater Design?
- Room Shape and Size: The dimensions and shape of the room significantly impact sound distribution. Ideally, a rectangular room minimizes standing waves and allows for better sound staging, while the size should accommodate the number of viewers and equipment without causing excessive reverberation.
- Speaker Placement: Proper placement of speakers is crucial for optimal audio performance. Front speakers should be at ear level when seated, while surround speakers should be positioned to create an immersive experience, typically slightly above ear level and to the sides or rear of the seating area.
- Acoustic Treatment: Utilizing acoustic panels, bass traps, and diffusers can help manage sound reflections and absorption. This treatment reduces echoes and reverberation, ensuring that sound remains clear and precise, enhancing dialogue intelligibility and overall audio fidelity.
- Flooring Materials: The choice of flooring can affect sound quality significantly. Hard surfaces like tile or hardwood can create unwanted reflections, while carpet can help absorb sound and reduce echoes, making it a preferable option for home theaters.
- Seating Arrangement: The layout of seating should promote optimal sound experience, typically where the main seating area is centered in relation to the screen and speakers. Arranging seats in a staggered formation can also prevent sound blockage and ensure all viewers receive a balanced audio experience.
- Sound Isolation: Minimizing external noise is essential for an immersive theater experience. Soundproofing techniques, such as using insulated walls and acoustic doors, can help keep outside noise from interfering with the audio quality inside the theater.
How Can Sound Quality Be Enhanced in a Home Theater?
Enhancing sound quality in a home theater involves several key elements:
- Speaker Placement: Positioning speakers correctly can significantly impact sound quality. Speakers should ideally be placed at ear level when seated, with the front speakers forming a triangle with the main seating area to create a more immersive experience.
- Acoustic Treatment: Adding acoustic panels, bass traps, and diffusers can help control sound reflections and improve clarity. By reducing echoes and unwanted reverberations, these treatments can provide a cleaner sound that enhances dialogue and music.
- Receiver Configuration: Using a high-quality AV receiver with proper calibration settings is crucial. Many receivers include automatic calibration systems that measure room acoustics and adjust speaker levels accordingly, ensuring balanced sound across all channels.
- Subwoofer Integration: Properly integrating a subwoofer into the home theater setup enhances low-frequency sounds. Placement is key; placing the subwoofer in different locations and testing which position provides the best bass response can significantly improve the overall listening experience.
- Room Layout: The layout of the room should minimize sound interference. Avoiding hard surfaces and creating a seating arrangement that prevents sound waves from bouncing off walls or furniture can lead to a more controlled and enjoyable sound environment.
- Quality Cables and Connections: Using high-quality speaker cables and ensuring secure connections can impact sound fidelity. Poor connections can lead to signal loss, so investing in good cables and ensuring proper installation is essential for optimal performance.
What Soundproofing Methods Are Most Effective?
Several soundproofing methods can significantly enhance the acoustics of a home theater.
- Acoustic Panels: These are specially designed panels that absorb sound waves, reducing echo and improving sound clarity. They can be mounted on walls and ceilings, and come in various materials and designs to match the aesthetic of the theater room.
- Soundproof Drywall: This type of drywall is made with additional layers of sound-dampening materials, making it more effective at blocking sound transmission between rooms. When installed properly, it can significantly reduce noise from outside or adjacent rooms.
- Weatherstripping and Door Seals: Applying weatherstripping around doors and windows creates a tighter seal, preventing sound leakage. This method is particularly effective for minimizing noise from outside and ensuring that sound from the theater does not escape into the rest of the home.
- Mass Loaded Vinyl (MLV): MLV is a dense material that can be added to walls, ceilings, and floors to block sound. It is flexible and easy to install, making it a versatile option for enhancing sound isolation in a home theater.
- Rug and Carpet Installation: Soft floor coverings, such as rugs and carpets, can absorb sound and reduce the amount of sound that bounces off hard surfaces. This helps to create a quieter environment ideal for enjoying movies and music without disturbance.
- Soundproof Curtains: These heavy, dense curtains are designed to block sound from entering or leaving a room. They can be used over windows or as room dividers to enhance privacy and acoustics within the home theater.
- Isolation Pads for Speakers: Isolation pads can be placed under speakers to reduce vibration transmission to the floor and walls. This minimizes sound distortion and helps maintain audio quality, especially for bass-heavy sounds.
What Are the Best Lighting Solutions for Home Theaters?
The best lighting solutions for home theaters enhance the viewing experience by creating the right ambiance while minimizing glare on screens.
- Recessed Lighting: This type of lighting is installed into the ceiling, providing a sleek and unobtrusive look. It can be dimmed to create a cozy atmosphere and directed to highlight specific areas without causing reflections on the screen.
- LED Strip Lights: LED strips can be placed along the edges of the screen or behind furniture to provide indirect lighting. This creates a halo effect that reduces eye strain and adds a modern touch to the overall design of the theater.
- Track Lighting: Track lighting allows for adjustable fixtures that can be directed to illuminate different areas of the room. This flexibility is beneficial for highlighting decor or seating while still maintaining control over the overall light levels in the space.
- Smart Lighting: Integrating smart lighting systems allows for customizable lighting scenarios through apps or voice commands. This can include automated dimming options that sync with movie playbacks or different lighting moods for various activities, such as watching movies or hosting gatherings.
- Wall Sconces: Placing wall sconces on the side walls can provide ambient lighting without being too harsh. These fixtures can enhance the room’s decor and help maintain a dark environment for optimal viewing while still offering sufficient visibility for navigation.
- Table Lamps: Using table lamps with dimmable features can enhance comfort in the home theater. These provide localized lighting for reading or intermissions without overwhelming the screen’s brightness.
How Does Lighting Affect the Viewing Experience?
Smart lighting systems take it a step further by allowing users to easily transition between different lighting setups with a simple command. These systems can automatically adjust based on the time of day or the content being viewed, creating a seamless and immersive experience.
What Types of Lighting Are Recommended for Home Theaters?
The types of lighting recommended for home theaters vary to enhance the viewing experience while minimizing distractions.
- Ambient Lighting: This is the general illumination of the room, which ensures that the space is not completely dark. It can be achieved through dimmable overhead lights or wall sconces, allowing for a comfortable environment without overpowering the screen’s brightness.
- Task Lighting: Task lighting focuses on specific areas for activities such as reading or managing equipment. This type of lighting can be provided by adjustable floor or table lamps, enabling users to perform necessary tasks without interfering with the overall viewing experience.
- Accent Lighting: Accent lighting highlights architectural features or decor within the theater, creating a more inviting atmosphere. This can include LED strips along shelves or behind the screen, enhancing the aesthetic appeal without drawing attention away from the movie.
- Screen Lighting: This specialized lighting helps to reduce glare on the screen and improves visibility. Using low-level lights that are strategically placed around the screen can provide just enough illumination to see the controls without disrupting the viewing experience.
- Smart Lighting: Smart lighting systems allow for programmable and adjustable settings, enabling users to customize their lighting based on the film genre or mood. This can include dimming, color changing, and automation options that enhance the overall ambiance of the home theater.